How do I create a new Redmine Project?
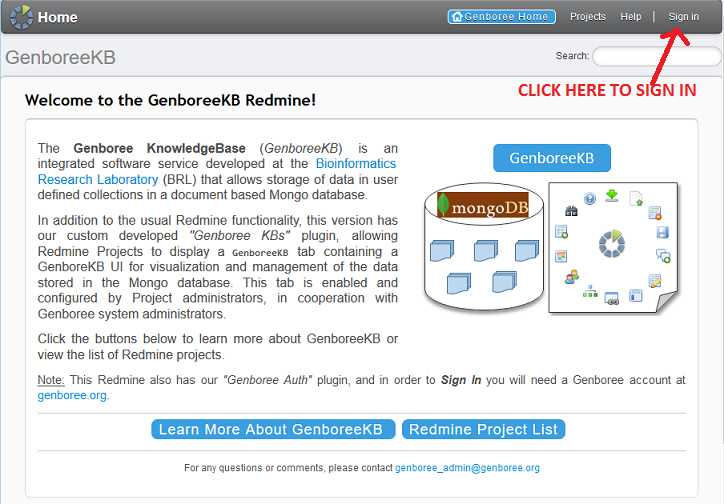
1) First, you must go to the GenboreeKB Redmine UI.
Click "Sign in" at the top of the page to sign into your account.
You should use your Genboree credentials (user name / password) to sign in.
You must have already created a Genboree account to log into GenboreeKB.

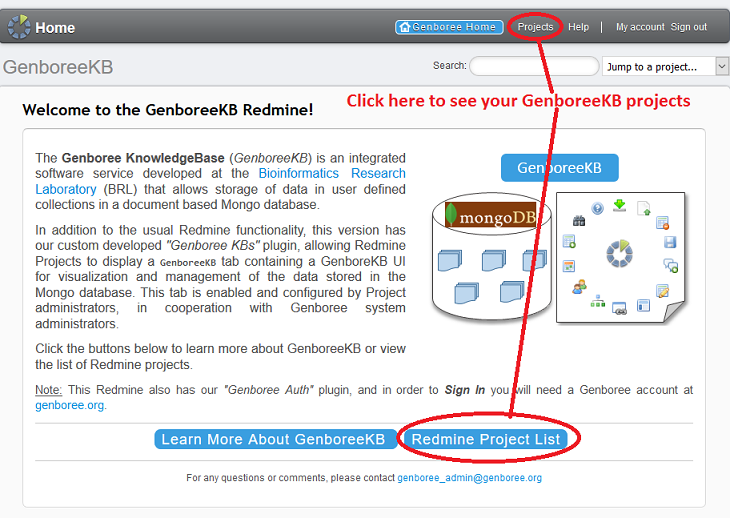
2) After you have logged in, click "Projects" at the top of the page (or "Redmine Project List" in the middle of the page).
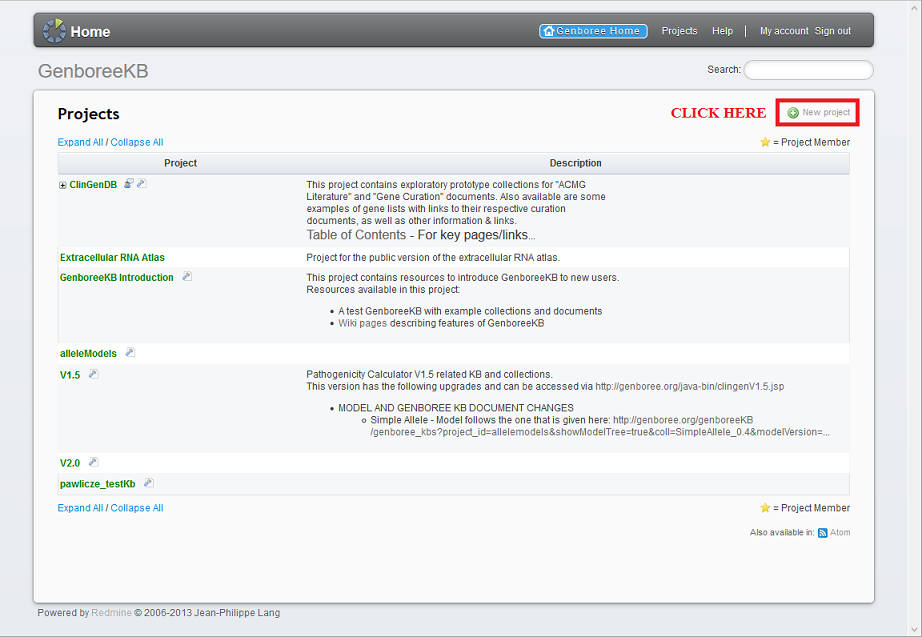
You will now be able to see all of the projects of which you are a member.
Any projects highlighted in green text are public projects which everyone can see.
3) Next, click the "New project" button at the top right corner of the page.
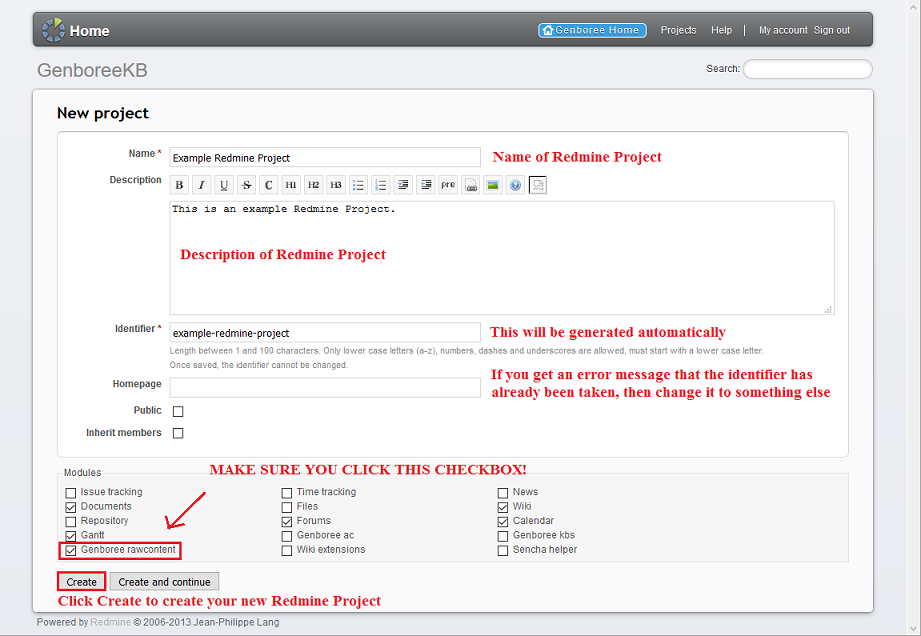
4) Pick a name for your new Redmine Project and, optionally, fill out a description for your project.
Since you want to be able to access your Redmine Project through the Genboree Workbench, make sure that you click the Genboree rawcontent checkbox.
Don't worry about any of the other Modules - they aren't important.
Finally, click Create to create your Redmine Project.
If you receive an error that your identifier has already been taken, then just change the identifier to something else (it's not too important).
If you forgot to click the Genboree rawcontent checkbox, or if you want to add Workbench functionality to a previously existing Redmine Project, then you
should click on your Project, go to Settings in the upper right corner, click on the Modules tab, click the Genboree rawcontent checkbox, and then click Save.
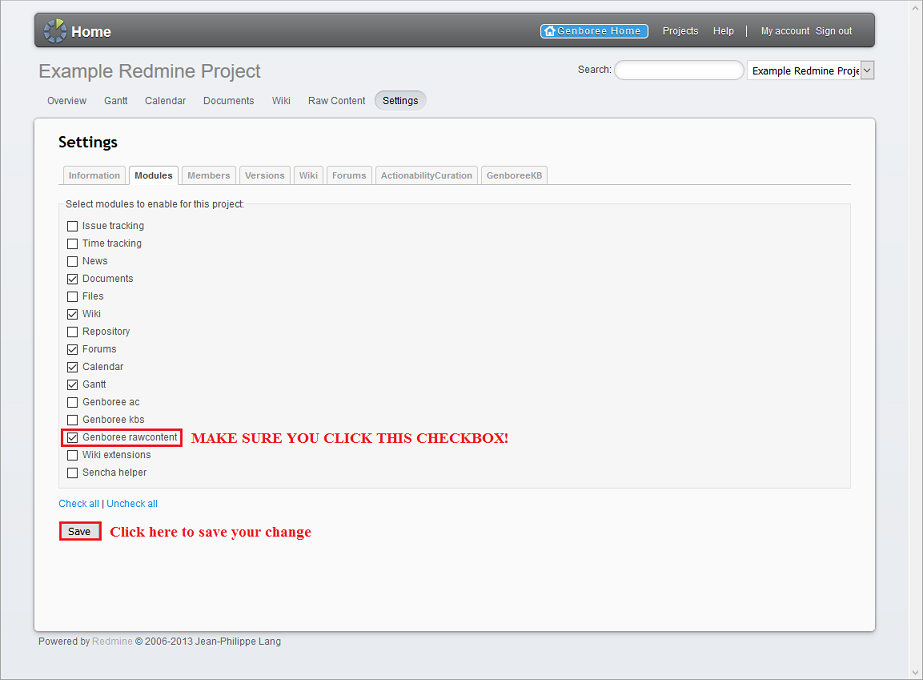
You must be an administrator of a project to access its Settings. You are automatically an administrator of any Redmine Project you create, but if you want
to add Genboree Workbench functionality to a previously existing Redmine Project, you will need to become an administrator before you can do so.
5) Now, you should log into the Genboree Workbench using the same Genboree username and password.
To link a particular Genboree Group to your new Redmine Project, drag that Genboree Group into the Output Targets panel.
Then, go to System/Network -> Redmine Projects -> Add Project in the tool menu at the top of the Workbench.
Your new Redmine Project will be available under the Project Name option (you can ignore the Redmine Name option).
Click Submit to create the link between your Genboree Group and your new Redmine Project.
6) If you open your Group on the Workbench, you will be able to see a new subcategory named Redmine Projects.
Your new Redmine Project will be a member of this subcategory.
Now, if a particular tool requires a Redmine Project, you can drag your new Redmine Project into the Output Targets panel to satisfy this requirement.
You can view all tool job outputs for a Redmine Project by selecting the Redmine Project and then clicking the "Link to Job Output" link.
Also available in: PDF